
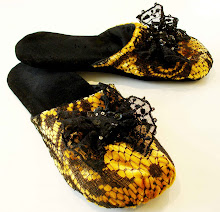
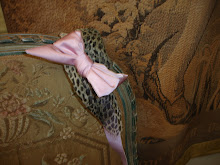
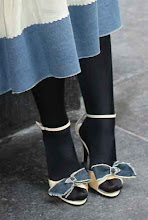
All you need is a pair of old cast-off jeans, some wadding and a ribbon to decorate. The rough and softly worn colors of the denim combined with sweet pink gingham bows gives them an irresistibly stylish and cozy charm. Suggested for a sewer of intermediate level. And not to rush through it, but to take your time, and hand-stitch the details, to give a beautiful, professional finish.
 List of Materials:
1 pair of jeans (any size)
½” x ¼” yard wadding
A piece of thin cardboard (not the corrugated type), about 12” x 12”
Click here, to print out the 2 pattern pieces
Note: Pattern is a ladies, medium adult size, or a size 8/38. To check the size, stand barefoot on the sole pattern. The edge of the pattern should extend about ¾” beyond your foot. Enlarge or reduce proportionally as needed (on a Xerox machine or with pattern making technique) to fit your foot.
5/8” x 1 yard pink and white gingham ribbon
White and blue thread (choose a blue shade that matches your denim)
Scissors, straight pins, sewing needle, pencil to mark notches, sewing machine
Assembly:
Cut the pieces:
1. Cut the legs off your jeans and cut the leg open along the inside seam. Press flat. Lay them flat on the table. Note: Notice and plan the color variations of the denim when you cut your pieces. I cut the pieces so that the uppers are in faded denim and the soles in the darker denim, and matched the shadings on the two slippers.
2. Cut 1 piece of the sole and 1 piece of the upper out of one leg. Mark notches with a pencil on backside. Flip the pattern pieces over and cut 1 more of each piece and mark notches.
3. Repeat for the other slipper.
4. Cut 2 pieces of the sole out of the wadding.
5. Cut 2 pieces of the upper pattern out of the wadding following the reduced cutting line marked on the pattern.
6. Cut 2 pieces of the sole from the cardboard, cutting 5/8” smaller all around.
7. Machine wash and dry the 4 pieces of denim uppers, to get frayed edges. Clip any really long frayed bits.
8. Press all denim pieces.
Sew It Together:

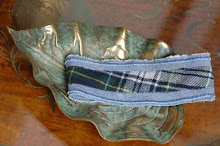
1. Sandwich the wadding upper between 2 denim uppers, with the right sides of the denim facing out. Pin, baste and stitch together, ¼” from the edge, around the perimeter, with the blue thread.
2. Stitch a running stitch between the notches (later it will be pulled to form gathers.)

3. Stitch a running stitch between the top notches on all 4 denim soles (later they will be pulled to form gathers.)

4. Align one denim sole, right side up, on top of a wadding sole. Pin together. Baste from the top notch, down the side, and up to the other top notch. Remove pins.

5. Pin the denim upper on the sole, aligning bottom edge on bottom notches. Baste from notch to notch. Remove pins.
6. Now pin a denim sole on top, back side up. Baste from top notch, down side and around to top notch. Remove pins. Machine sew along basting line. Remove basting.
7. Clip seam allowance.
8. Turn it inside out. (You have to wiggle it a bit to get everything through the toe.) Then take something long like a chopstick, and slip it inside to push the seam allowance firmly to nudge it into a nice smooth edge along the seam, especially along the curve of the heel.
9. Slip the cardboard inside, between the two pieces of denim. (The cardboard will be the lower part of your slipper, and your foot will rest on the soft wadding.) It can be a bit of a struggle to slip the cardboard inside, but even if you fold it a bit in order to squeeze it through, don’t worry, it will re-flatten out and be supportive.
10. Now repeat with the other set of pieces.
Gather The Toe:

1. Pull the running stitch to from soft gathers on the bottom denim sole so the toe curves gently around the card board edge. Knot the thread. Pull the running stitch to form gathers along the top sole and upper so that they align with the shape of the lower sole and knot threads. With the seam allowance neatly tucked inside, pin the toe closed. Baste, remove pins, and with the blue thread, hand sew toe closed securely with little back-stitches.
Note: Take your time to sew neat little stitches and to keep the gathers evenly distributed. It is this attention to detail that will give your slippers a professional finish.

2. Repeat with the other slipper.
Adorn Your Slippers:

1. Cut the ribbon in 4 pieces of equal length. Take 2 pieces, pin on the slipper front, about 2 ½” apart with a ½” fold back. Hand stitch in place along folded edge. Tie into a snug bow. Cut ribbon ends at a diagonal.
2. Repeat with the other slipper.
Note: You can make many decorative variations on these slippers. Adorn them with saucy feathers and beads, with pretty buttons, different fabric mixes or fabric flowers. Just search through your sewing basket to find the right combination that reflects your personal style.
Knot all threads securely.
Voila! You’re finished!Link for patterns:


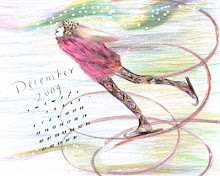
 (to download or print a copy of May's screen saver, click here)

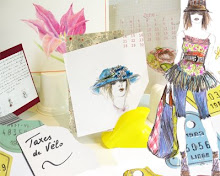
 This breezy, dress started with some vintage yardage, with a soft, cottony, hand feel and a pretty 50s era print. The fabric was narrow, only 36” wide, so I had to do some figuring to achieve a luxurious sweep to the dress - which was how it grew into the flounced design. The top part is based on
 ...and I still am hunting for the other photo.


